Sunshine Coast Museum & Archives
Museum Hours  
​Tuesday - Saturday      
10:30am-4:30pm     
​
  • Collections
    • Photograph Collection
    • Newspaper Archives
    • First Nations
    • Fishing for a Living
    • Marine Transportation
    • Telecommunications
    • George & Charlotte Gibson
    • Helen McCall - Early Photographer
    • Beachcomber Relics
    • Farrell Family
    • Early Logging
    • Early Agriculture
    • Inglis and Woodsworth Families
    • Howe Sound Cooperative Cannery
  • Learning
    • Podcast Features
    • Education Kit
    • Genealogy >
      • Cemeteries
      • Churches
      • Genealogy Links & Records
      • Places of Research
      • Schools
      • Societies and Support
    • Museum at Home
    • Museum School
    • School Classroom Visits
    • Historical Videos of the Sunshine Coast
  • Blog
  • News/Events
  • Shop
  • Sunshine Coast
    • Gibsons
    • Roberts Creek
    • Sechelt
    • Halfmoon Bay
    • Pender Harbour
    • Egmont
  • About Us
    • Contact Us!
    • History & Mandate
    • Museum Services
    • Make a Donation!
    • Membership
    • Employment
    • Volunteer
    • Staff & Board of Directors
    • Links

The Process of Digitization

7/27/2016

0 Comments

 
          This week an integral member of the museum came back to work – Garry Morrison, our Image Technician. After two months away on leave he is back and ready to get to work! Gary has been our Image Technician for 16 years, and has digitized all of our collection up to date. Prior to working with us he was a professional photographer that worked on everything from events to celebrity photography. His favourite celebrity to work with was Tina Turner.

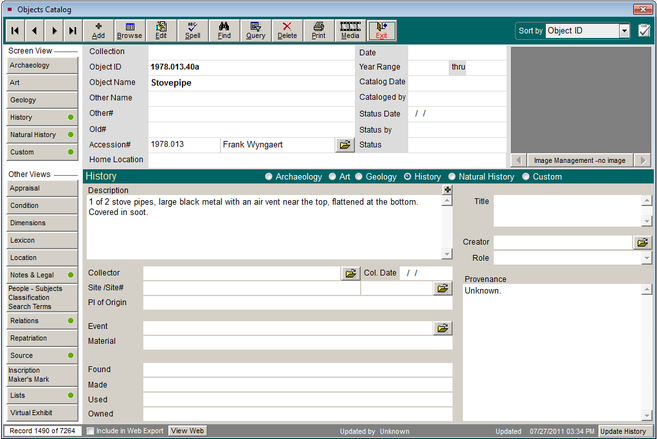
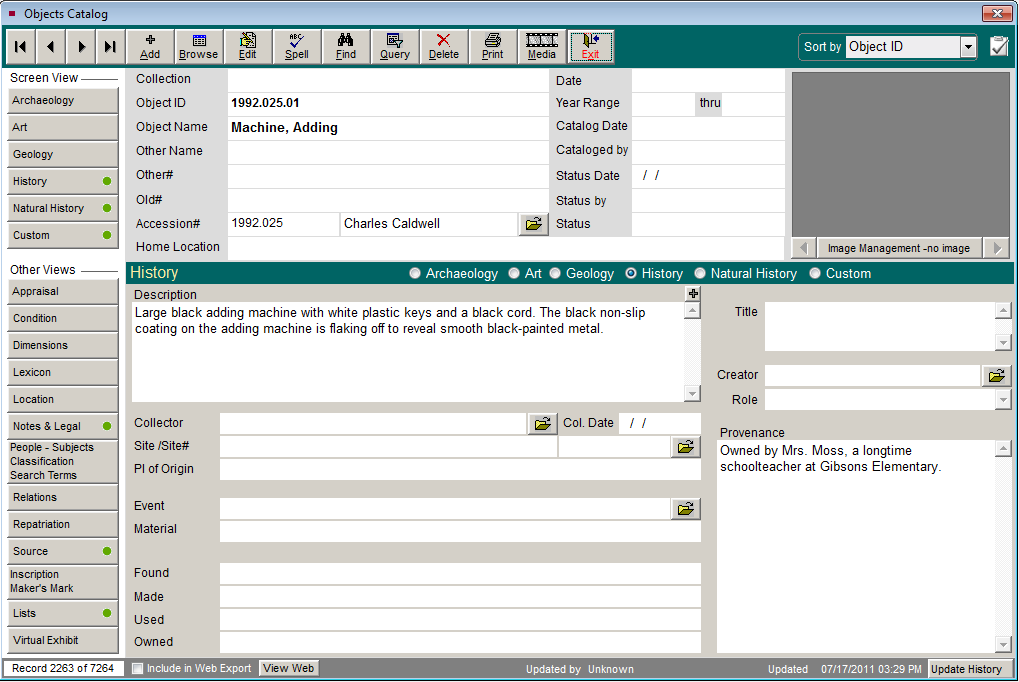
          With Garry back came the perfect opportunity for me to learn about an integral process to the Museum: digitization. Digitization is the process of converting information into a digital format. At the Museum we digitize our photos, newspapers, artifacts, and archives to make database entries easier to navigate. When database entries have a digital reproduction (i.e. an accompanying photograph) it is much easier to confirm we have found what we are looking for – see this blog post for an example!

           We have also used digitization to make our collection more accessible to you! Our Photo Collection and Newspaper Collection have been made available online, and both are great examples of digitization. We received a grant from UBC to digitize our newspaper archives and they also host both the Coast News and the Peninsula Times on their website. This was done in two phases: Phase One handled newspapers dated approximately 1940-1980, and Phase Two covered 1980 onward.

           What are the common ways to digitize physical items? We use two different methods here at the Museum, but there are definitely countless more technologically advanced ways to digitize items. As we are just a small Museum, we stick to the simplest ways of making our information accessible.

           The first way is to scan the items. This can be done using a printer/scanner or a simple scanner. The model we use is the EPSON Perfection V700/V750 Photo. It was state of the art when we bought it, and honestly it still works great. The scanner allows us to digitize a high volume of objects in a fairly short amount of time. Letters, photos, and magazines make up the bulk of the items we digitize using the scanner. Usually we only scan the front page, but if there is something of interest on the back (i.e. informational text) we will also make sure to scan the back. For multiple-page documents we will scan the first and third page. Scanning is a valuable way of digitizing items because it is fast-paced and straight-forward.
Picture
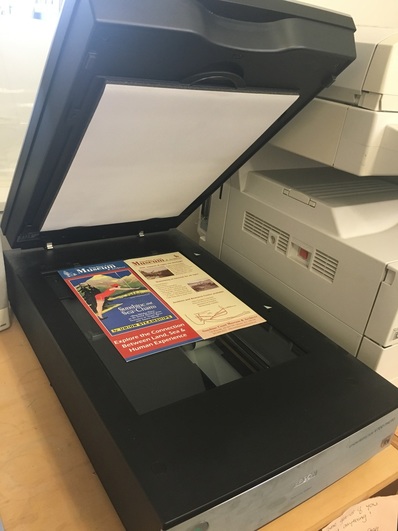
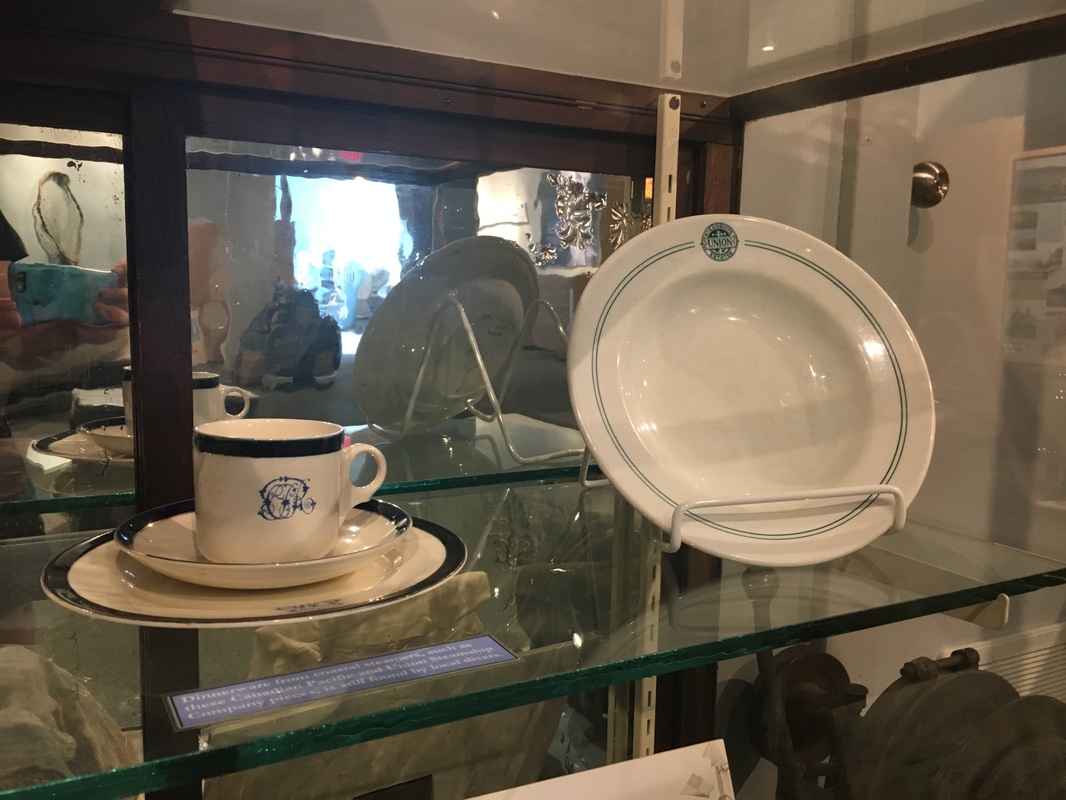
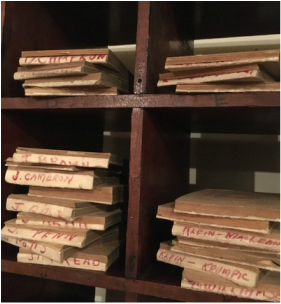
Fig. 1: In cases where we have more than one of the same item and both sides need to be scanned, we can cheat the system a bit.
         In the case of our Newspaper Collection, the scanning process was a little different. We did not scan each and every page of each and every newspaper we have; that process would create unnecessary mechanical wear on the newspapers, as well as introduce the papers to harmful light pollution. Instead, we used microfilms. Microfilms are a type of open reel or cassette ‘negative’ where high volumes of content can be stored in a very small space. By using the microfilm instead of the archival document we were able to make high-quality, high-resolution scans of newspapers without any risk!

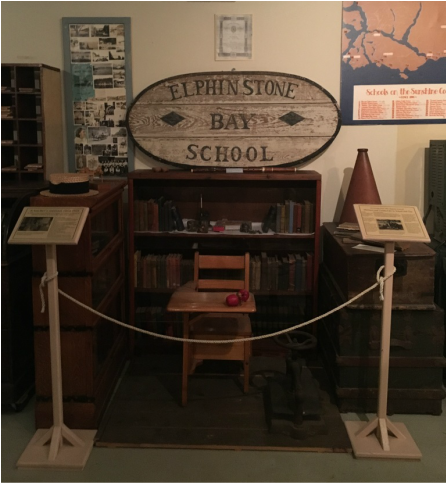
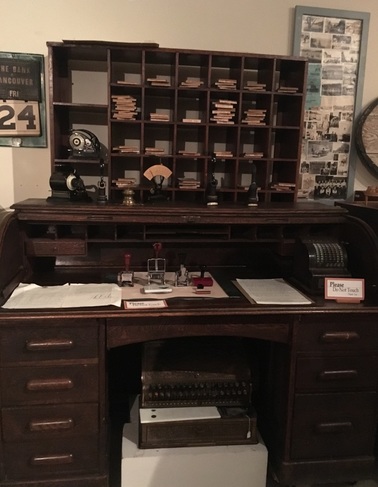
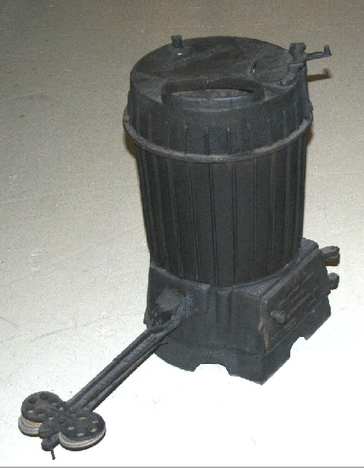
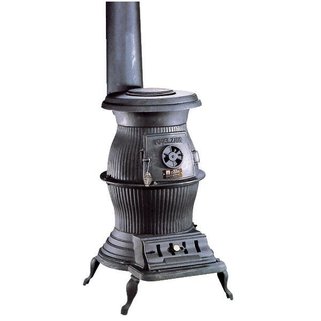
          The problem comes when we have to digitize an item that cannot fit in the scanner! Can you imagine trying to scan one of the six farming sickles we have in our collection?


          Instead of scanning items like this, we photograph them. A three-sided box is made of white, lightweight material (examples below) and the item is placed inside. The camera – a higher quality camera that will produce good, high resolution photos - is placed directly over-top the object, and the flash is angled towards the back wall. This way when the camera flashes it will bounce off the sides of the homemade box and onto the object, effectively preventing any shadows. After the photos have been taken they are uploaded to the computer and manually inputted to the database.
Picture
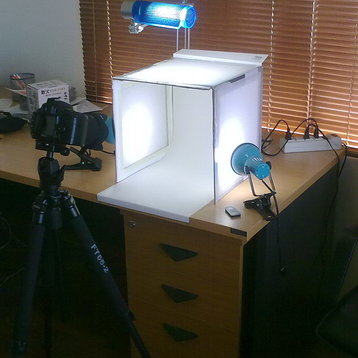
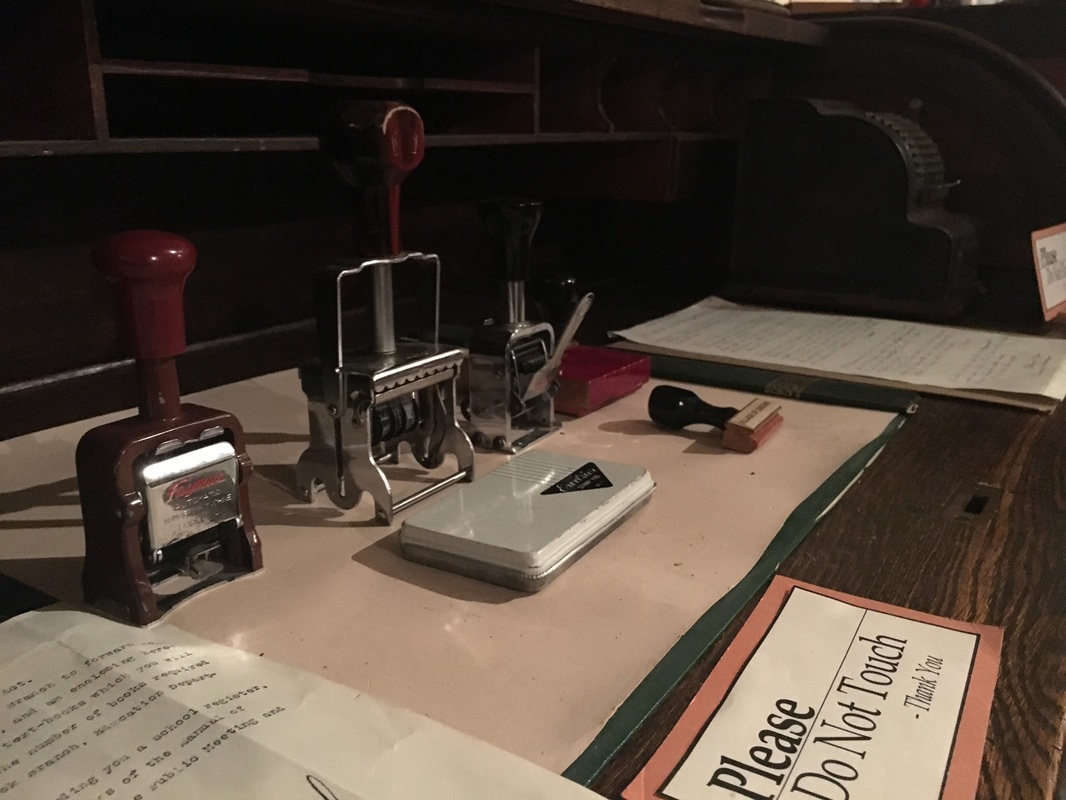
Fig. 2: A homemade lightbox used to photograph artifacts or products for sale. Note the placement of the camera and lights.
​         This process is used because it is also simple and straightforward. Pictures are taken, uploaded, then the best one is chosen and uploaded to the database. There are no tricky steps or big processes to endure besides choosing the best photo to represent your object. The only difference between the scanner and the camera is that one is for documents while the other is for artifacts.
Just for fun I will link you to a few other institutions that have online collections. Each of these has a different way their information is presented, so have fun looking through!
         http://www.uvic.ca/library/featured/collections/index.php
         https://open.library.ubc.ca/

         http://library.harvard.edu/digital-collections
0 Comments

How are Exhibits Created?

7/20/2016

0 Comments

 
          Exhibits are the main point of a Museum – they showcase the collection, tell a story, and educate about the history of the area. In our Museum we focus on the area inside the geographical boundaries of “…McNab Creek to the North, Howe Sound to the East, the Strait of Georgia to the South, and Jervis Inlet to the West”, as well as showcasing pieces that are tied closely to the history of the community that may not necessarily fall within that geographical boundary.

          The main floor features Squamish stone tools, dating back 10,000 years, a Fishing and a Marine Transportation exhibit that includes the Union Steamships. Soon, in our feature exhibit space, we will have a Coast Salish weaving exhibit –  Syets-chet lhen-tumulh txwchelhk̲w-anam/Our Stories Woven through Time – which is co-curated with the Squamish Lil’wat Cultural Centre. Upstairs boasts exhibits about agriculture and logging, pioneer families (Gibsons, Inglis, Woodsworth, and Finnish immigrants), Beachcombers, and technology exhibits that have special emphasis on happenings within Gibsons.

          But what goes into the making of these exhibits? What sort of artifacts need to be included, how should they be included, and to what extent should they be explained? How do we ensure that the exhibit is going to tell the story that we need it to tell? To answer these questions I am going to use three examples of exhibits that I put together: the Union Steamship exhibit downstairs, and the school and office exhibits upstairs. While the physical assembly process was similar in each exhibit, the stories they are presenting is very different.
​
          The Union Steamship exhibit focuses on the ferries of the coast, specifically the Union Steamship company that ran up and down the BC coast between 1889 and 1959. The steamships essentially functioned as ferries: carting people and objects (such as cars) from the mainland to the Coast, but not making as many trips as the BC Ferries does. While BC Ferries make multiple sailings a day, the Union Steamships would make their rounds to the Sunshine Coast every three days or so. More information on this can be found in our Marine Transportation section of the website.
​
          To represent this story we have a limited selection of artifacts – a series of Union Steamship plates, mugs and cutlery, a life vest, a round life preserver, and various pictures. These artifacts need to be arranged to complement the text that accompanies them, giving  us a hint as to what life would have been like on these ships. With that in mind, is what we came up with:
Picture
Fig. 1: The completed Union Steamship exhibit.
Picture
Fig. 2: Union Steamship Bowling Shirt belonging to Miss Virginia Puchalski.
Picture
Fig. 3: Union Steamship dishware.
​          The school exhibit lives on the second floor. It simulates a small classroom, with planked flooring, a small desk, and schoolbooks all around. A large school sign and several small toys are also part of this exhibit. While assembling this exhibit it was important to emphasize that these artifacts came from a place of learning, but also that these objects were primarily used by children. For me, it meant the space should be serious but whimsical – if you look closely you will see storybooks interspersed with the textbooks in the bookcase behind the desk, and toys and musical instruments on top of the shelves. Here is the finished product, with a couple close-ups:
Picture
Fig. 4: Completed Schoolhouse exhibit.
Picture
Fig. 5: A number of items commonly used in schoolhouses (i.e. bell, megaphone). Of special interest are the two floorboards from the first schoolhouse in Gibsons.
Picture
Fig. 6: A series of schoolbooks placed behind the desk. Titles include: Elementary Algebra, Canada: New World Power, and Psychology for Students of Education.
​          Finally, the office exhibit. This is modeled after the office of Mr. W. Winn, a prominent businessman of the area. This exhibit features an adding machine, many stamps and embossers, and an impressive amount of receipt books. Mr. Winn was a very busy man – his ledgers are full to the brim with notes about business, and his adding machine tells us that he needed a faster way to do math than longhand addition and subtraction. Mr. Winn’s exhibit features his receipt books alphabetized in cubbies behind his large roll-top desk. The desk itself has more symmetrically placed artifacts, showcasing the items Mr. Winn would have used the most during his business days.
Picture
Fig. 8: The completed Mr. Winn office exhibit.
Picture
Fig. 9: A sample of receipt books from Mr. Winn. Note the names on each book!
Picture
Fig. 10: A number of stamps set up inside the roll-top desk.
          ​What are your opinions on these exhibits? Is there a different way you would have showcased the artifacts, or a different story you would have told? Feel free to let us know in the comments!
​
          Be sure to come down and visit us at the Museum to interpret the exhibits for yourself –we are open Tuesday through Sunday, 10:30am – 4:30pm! We look forward to seeing you soon.
0 Comments

How to Conduct Research: Hubert Evans

7/13/2016

1 Comment

 
          Lately I have been presented with a lot of questions about Hubert Evans: who he was, where he came from, and why he was important. I had no idea how to answer any of these questions; all I knew was that Hubert Evans built the handliner (a double ended rowboat) that we host in our Maritime exhibit at the Museum.

          These questions got me thinking, and thinking led me to researching, and researching led me to some pretty cool conclusions about Hubert Evans – you can look for those conclusions in a future blog post or article. Instead, I thought I might take you through the research process so you can see the steps to making an authoritative research report, this time featuring Hubert Evans.
Picture
Fig. 1: A table of sources that explains what each source is.
          The first thing that needs to be done when researching is look for reference material, referred to as sources, on what you are trying to find. These sources can be anything from first-hand interviews or journals from the person or time period you are trying to find, to someone’s personal blog. This is where the diagram above will be referenced – an excellent source is at the top of the pyramid, while a poor source is at the bottom. Personal blogs are not something that you should take from directly. It may lead you to a legitimate source, like a newspaper article or an academic paper, but you shouldn’t use the blog itself for anything other than a stepping-stone. You will also come across Secondary and Tertiary sources a lot.

          Primary sources, aka something that came directly from the person, place, or thing you are researching, are great sources that you should always look for first. They are usually what you would build your research around. Secondary sources are academic articles, biographies, or professional pieces written about the thing you are researching, and provide opinions and commentary, while tertiary sources give a summary of the primary source.

          As they are important to our collection, it is important to note that newspapers can be primary, secondary, or tertiary sources depending on the content. If it is written by the person you are researching, it is a primary source. If it provides commentary or discussion on what you’re researching, it’s a secondary source. If it is a summary of what you’re researching, it’s a tertiary source.

          With that in mind, how lucky am I to work in a Museum where I have a database with thousands of primary sources at my fingertips?

          Just like in my last couple of blog posts, I started with broad searches using the keywords “Hubert Evans” or just “Evans”. I searched through our Library, Photos, and Objects, and Archives, but only got a few hits. Just two books mention him: Remembering Roberts Creek: 1889 – 1955, and Hubert Evans: The First 93 Years by Alan Twigg. Three oral histories mention him in reference to his fishing career and the handliner boats he made.  We have three photos of him; one as a young man near his boat filled with fishing gear, and another of him as an old man standing outside his home. Yet another picture features him on a tractor digging at the bank of Roberts Creek, but his face is hidden from view.
Picture
Fig.2: Young Hubert Evans near his boat that is filled with trolling gear.
Picture
Fig. 3: Elderly Hubert Evans standing outside his house in Roberts Creek. No date is given.
          After all that we have a couple of viable primary sources: the photo, the handliner, a newspaper article, a letter to Elinor and Lorns Daly, and a pamphlet of poetry publications called Bits and Pieces. Hubert Evans: The First 93 Years by Alan Twigg is a biography, and therefore counts as a secondary source, as does Remembering Roberts Creek. Hubert Evans books, while fictional stories, count as primary sources because they were written directly by him. Son of the Salmon People and The New Front Line are the only two works of his that are in the collection. After documenting these finds and taking notes about Evans’ interesting life I found I was not quite satisfied – I wanted to know more about the different stories that Evans had written.

          This is where I step back and search more broadly. You may not want to use Google or a similar search engine out of fear that you will end up on personal blogs, but in this case that can be helpful. What I was searching for was a list of pieces authored by Hubert Evans – even if I end up on someone’s blog I can use the information I find there to find publishing information. Publishing information leads me to the publisher’s website, and that leads me to a comprehensive list of titles that Hubert Evans authored!

          Despite how straightforward that sounds, this was tricky. Hubert had many books published by many different publishers, and some of his stories were reprinted at later dates. This is where I would refer back to secondary sources like the biography (Hubert Evans: The First 93 Years) – that will have authoritative information about the works that Evans published. For example, the publishing date I found for his most popular novel, Mist on the River was 1973. When I took another look at The First 93 Years I found that 1973 was the reprint date: the initial publishing date was in 1954, and was under a different publishing house.
Picture
Fig. 4: A clip of the masterlist I have compiled on Hubert Evans. This clip exemplifies multiple publication dates.
          After I acquired all this information I compiled it into a masterlist of Hubert Evans information. Because I am an English major at university I like MLA (Modern Language Association) formatted citations so I based this masterlist off that format, with some changes for ease of access. I also included the notes I took from The First 93 Years and Remembering Roberts Creek. This masterlist will be referenced often for research purposes, so making everything easy to read and find was the first priority.

          So there you have the research process! If you yourself have anything you’d like to research, now you know where to go. Make sure you come down to visit us at the SCMA with your research requests; we would be happy to help you look through a wide range of sources!
1 Comment

Strange Objects: Do You Know What This Is?

7/5/2016

0 Comments

 
Picture
Fig.1: The unidentified object. Any guesses on what it is?
     Do you know what this is? We didn’t.  Our artifact collection contains over 7264 items, so on occasion we come across an artifact with an unknown function. We try not to use or alter the artifact in any way, so most of the time there is no clear way of figuring out what the heck something does. As a new staff member here at the museum, I have a particularly hard time figuring this type of thing out.
Picture
Fig. 2: The accession number for our object - 96.001.01F
​     As you can see, the item has a little white mark on the bottom – this is the only change we make. On that little white mark is an accession number, which helps us figure out what an item is. “Accessioning” is the formal process by which an artifact enters into our collection, meaning that after the accession is complete we have legal ownership and responsibility of the item and its preservation. The number assigned to that item is then put into the database, and if you search for that number you should find the item! But what happens when you don’t have the number? I’ll take you through both the ‘with’ and ‘without number’ processes.
               
     Accession numbers for objects follow a specific pattern, for example: 1996.001.01. The first four numbers are the year the object was accessioned (1996), followed by a number that represents which ‘group’ the object came in with (001, meaning this was the 1st group of things to be accessioned in 1996), and finally the number of this specific item within its group (01, meaning it was the 1st item in this batch). If there is a letter following this last number, it means that there are multiple pieces of the same artifact. For example, one of the pieces I will talk about in this post has two parts to one pipe, and is thus differentiated in the accession number using ‘a’ and ‘b’. The number looks like this: 1978.013.40a or 1978.013.40b.
​

     There are two ways to go about this: one way for if you have the accession number, and one for if you don’t. If you don’t have the accession number you can go through the archival database, searching with keywords to see if you can find a match in the pictures or description – very similar to how we proceeded in the last blog post I made! The problem with this is that sometimes the entries do not have pictures, only descriptions, which makes it hard to confirm that you’ve found the item you’re looking for.  For this item I used the keywords “black” and “metal” in a broad search, and came up with a couple possible matches.
Picture
Fig.3: The database page for accessioned item number 1978.013.40a
     The matches I found by using keywords in the database were 1978.013.40a and 1992.025.01. Neither of these entries have pictures in the database, so I cannot be sure that they are really a match to the object I am trying to find, but it is because these entries have no picture that they could be a match.

​     1978.013.40a is described as a stove pipe, with “…an air vent near the top, flattened at the bottom. Covered in soot”. Does this description match the picture at the top of the post? It’s definitely a possibility, but we could do better.
Picture
Fig. 4: The database page for accessioned item number 1992.025.01
     The next item is 1992.025.01. This is described as “…a large black adding machine with white plastic keys and a black cord…black non-slip coating … is flaking off to reveal smooth black-painted metal”. This could be our item. It is black like ours, and the paint is flaking like ours, but ours doesn’t have any white keys. This is also not our item!
​

     Luckily, our item has an accession number on it! All we have to do is take this number and search for it in our database, and voila!
     Even though we have the accession number, this still took a little bit of work as the accession number pictured (fig.2) is one that follows an old format. Fortunately we can still find the same information! It turns out that, with some fiddling, 96.001.01F translates to 1996.001.01. Using the accession number, 1996.001.01, I can do a specific search for our item.

     Our item is a “pot belly stove” that was used for heating homes using wood! In hindsight, this makes a lot of sense. We can see now that the small door at the front was for coal, while the tall upper section was for fire and the long joined pieces were to control air-flow. Because this object came with only a description, and no history attached (we don’t know who owned it, where it came from, or if it is even relevant to the Coast) it is referred to as an Example of Kind. Being an Example of Kind makes this object relevant to the collection because it was an example of the common technology of the eras we are trying to preserve.
Picture
Fig. 5: Our pot-belly stove next to a more popular/modern version
Picture
Fig. 6: A more popular rendition of the pot-belly stove next to our accessioned version
     See you next week for some more adventures into the collection! Feel free to tell us your initial thoughts on what the object was in the comments below!
0 Comments

    Categories

    All
    BC Historical Newspapers
    Black History Month
    Book Launch
    Borrowed Body
    Canoe Culture
    Canoe Journey
    Collaboration
    Community Building
    Digitization
    Exhibit Exchange
    History Of Racism
    Immigration
    Irving K. Barber Learning Centre
    Japanese Internment
    Konishi Family
    Newspaper Digitization
    Open Mic
    Peformance Poetry
    Peninsula Times
    Performance Poetry
    Squamish Nation
    Sunshine Coast
    UBC Library

    Archives

    December 2022
    September 2022
    August 2022
    June 2022
    January 2022
    September 2021
    July 2021
    June 2021
    November 2020
    July 2020
    June 2020
    September 2019
    August 2019
    July 2019
    June 2019
    July 2018
    June 2018
    September 2017
    August 2017
    July 2017
    June 2017
    September 2016
    August 2016
    July 2016
    June 2016
    October 2015
    September 2015
    July 2015
    September 2014
    August 2014
    July 2014
    June 2014
    May 2014
    April 2014
    March 2014
    January 2014
    November 2013
    September 2013
    July 2013
    June 2013
    May 2013
    April 2013
    January 2013
    December 2012

    RSS Feed

     Home     |     Collections     |     Learning     |     Events     |     Gift Shop     |     News     |     The Sunshine Coast     |     About Us     

© Copyright 2022 Sunshine Coast Museum & Archives
716 Winn Rd., Gibsons, BC. (604) 886 8232


Donate Now Through CanadaHelps.org!